Category Archives: Tip

AutoCAD 2018 – disable InfoCenter

Here’s another AutoCAD 2018 download, just in case you haven’t had enough.

If you want to disable AutoCAD’s InfoCenter (and you should, unless have a specific reason for keeping it – here’s why), go get the updated download from uber-expert Owen Wengerd’s ManuSoft Freebies page. It works for AutoCAD and AutoCAD LT.

Script for creating AutoCAD Classic workspace

Edwin Prakaso at the excellent CAD Notes blog has done something that, in hindsight, is blindingly obvious but nevertheless very useful to a multitude of people. He’s written a simple script file that sets up the Classic workspace (or something close to it). It works in any recent AutoCAD or AutoCAD LT. Here’s the blog post:

AutoCAD Script to Create Classic Workspace Automatically

Edwin uses Microsoft OneDrive to store the script file, so if your workplace restricts access to Cloud storage you might need to download it at home.

I’ve added a reference to this script to my post AutoCAD 2017 – Putting things back to “normal”.

Huge PDFs? AutoCAD 2017.1.1 could be to blame

Autodesk has yet again demonstrated why continuous automatic updating is no panacea for avoiding CAD update disruption. On the contrary…

If you have noticed some of your PDFs exported from AutoCAD getting huge and unwieldy lately, AutoCAD 2017.1.1 could be to blame. Try uninstalling it using Programs and Features > View Installed Updates and see if the problem goes away. It may also be possible to work around this by going into PDF options and turning on Include Hyperlinks. Source: The Swamp.

Here’s one possible* install history:

  • You install AutoCAD 2017. This defaults to also installing Autodesk desktop app. If this works on your system and you leave it on there doing its thing and consuming your resources, it will attempt to automatically keep your Autodesk software up to date.
  • Autodesk desktop app installed AutoCAD 2017.1. You like this because it has added a couple of nice features. In apparently unrelated news, you seem to be getting more fatal errors and several of your add-ins have stopped working. You decide to do without them.
  • Autodesk desktop app installed AutoCAD 2017.1.1. Your add-ins have magically started working again and there seem to be fewer fatal errors.
  • You get some huge PDFs from AutoCAD but read this post and uninstall AutoCAD 2017.1.1. The PDFs you create are no longer huge, but your add-ins have stopped working again and there seem to be more fatal errors.
  • You read this other post and manually install the AutoCAD 2017.1 Hotfix. Your add-ins start working again. The fatal errors remain.
  • Autodesk desktop app continually and perpetually nags you to install AutoCAD 2017.1.1.**
  • You uninstall Autodesk desktop app. Your system speeds up and the nags go away.

Moral of the story? Autodesk isn’t competent enough to trust with automatic updates. Uninstall Autodesk desktop app. Relax.

* YMMV
** I don’t know if this actually happens (Autodesk desktop app is not going to be installed on any of my systems to find out) but it wouldn’t surprise me.

Reset an apparently dead Samsung Galaxy Tab S 8.4″

…with this one simple trick!

I had my Samsung Galaxy Tab S 8.4″ Android tablet spontaneously die last night, and it refused to respond to any button pressing, cable connecting or threats. Holding down the power button for 10 seconds (or more) did nothing, as did Dr. Google’s top tip of holding down Power, Volume Up and Home for 10 seconds.

What worked for me was holding down Power, Volume Up and Volume Down for 10 seconds. It restarted without anything being lost and is now back to normal.

Undo, U, Redo, Erase, Oops differences explained

It’s been a while since I posted any beginners’ tips, so here goes.

There are several commands in AutoCAD to do with reversing things you’ve done. They are in some cases subtly different and this can confuse newcomers. Here’s what they do:

  • U – reverses the last command you used.
  • Redo – reverses the last U or Undo operation you performed, if that’s the last thing you did.
  • Undo – displays a set of command options that allow greater control over undoing things. (This is rarely used directly by a user, and is more of a programmer’s tool, so I won’t be going into any detail).
  • Erase – removes from the drawing an object or set of objects as selected by the user.
  • Oops – reverses the last Erase command, even if you have done other things in the meantime. (It also reverses erasures performed by the Wblock command, but such reversal is rarely needed these days).

Note that many commands also have an Undo subcommand  which is different again from all of the above. For example, start the Line command, pick a few points, then enter Undo while still in the command. Just the last segment will be removed, and you can carry on picking more points. Most subcommands can be abbreviated, and this is true of the Undo subcommand within the Line command. While still in the Line command, enter U and this will have the same effect as entering Undo in full (or the other possible abbreviations Un and Und).

This is not the case when entering full command names; entering U and Undo at the command prompt will do different things, although command line auto-complete can confuse matters further depending on your settings. I’ll ignore that for the sake of brevity.

Let’s go through a command sequence that uses all of these things.

  • Enter the Line command (type LINE and hit [Enter]). Pick 6 points to create 5 lines but don’t hit [Enter] yet. While still in the Line command, enter Undo (UNDO [Enter]). This will use the Undo subcommand of Line to undo the last drawn line segment, leaving 4 lines. Pick another 2 points, leaving a total of 6 lines. While still in the Line command, enter U. This will undo the last drawn line segment, leaving 5 lines. Hit [Enter] to finish the Line command.
  • Enter the Line command, pick 4 points to draw 3 lines and hit Enter to finish the command.
  • Enter the U command. The effects of the last command (Line) will be undone, removing all 3 of the lines created by it.
  • Enter the Redo command. The U command is reversed, restoring the 3 lines.
  • Enter the Undo command. This will give you a few options, but the default is the number of steps to undo. Type 2 [Enter] and the last 2 commands will be undone (ignoring the U/Redo), removing the set of 3 lines and the set of 5 lines.
  • Enter the Redo command. The Undo command is reversed, restoring both the 5 lines and the 3 lines.*
  • Enter the Erase command. Select one line from the first group and two from the second, then hit [Enter] to finish the command and those 3 lines go away.
  • Enter the Move command. Select the remaining 2 lines from the first group, hit [Enter] to finish the selection process and pick two points slightly apart to move the lines a short distance.
  • Enter the Oops command. The 3 lines removed by the Erase command are restored, but note that the effects of the Move command are unaffected. If you had used the U command twice to restore the erased lines, the Move command would also have been reversed.

Clear as mud? There are other possible complications depending on various settings, and there are various user interface options for invoking the commands that I haven’t discussed, but this will do to explain the basics.

* The information in this post applies to any AutoCAD from the last 30 years, but as the command set in BricsCAD is almost identical, it can be used for BricsCAD too. Mostly. There is one exception; if you use Undo to perform several undo steps at once, then follow that with a Redo, only one undo step at a time will be reversed. If you want to redo everything, you will need to hold your finger on the Enter key to repeat the Redo command until it runs out of things to redo. Depending on what you want to do, this can either be very handy or rather inconvenient.

AutoCAD 2017.1.1 Update

Thanks to Jimmy Bergmark, I now know that the controversial subscription-only* AutoCAD 2017.1 Update has itself been updated. Jimmy was brave enough to install and run the execrable Autodesk desktop app and discovered the update update. Rather you than me, Jimmy!

Here’s the readme. You’ll need to get at it using Autodesk Account.

I note that a bunch of crashes are fixed by this update update. Perhaps that is related to the magical missing AutoCAD 2017.1 crash information? Who knows?

The update was apparently released over a month ago on 17 November 2016. Autodesk needs to work out an alternative mechanism to Autodesk desktop app so that those of us who won’t/can’t use it will still be informed when updates become available. If only there were some other method Autodesk could use to communicate with customers! Too hard, apparently.

* not really

The best thing about AutoCAD 2017.1 is…

…the fact that one of the Express Tools finally got an update. Not just a minor maintenance tickle or mere absorption into the core code, either. A real update, resulting in not only bug fixes but genuinely useful improvements in functionality.

A little background on Express Tools might help put this into context. The history goes back to 1992 and AutoCAD Release 12. In addition to an impressively full set of paper manuals, people with Release 12 (great value at US$500 to upgrade from any earlier release) obtained a Bonus CD containing 2605 files of free add-on goodness. Fonts, LISP, DOS and Unix utilities, sample drawings, demos, all sorts of stuff. Remember that just popping on the web to grab that sort of thing wasn’t really an option at the time, so this CD was quite a big deal.

autocadrelease12bonuscdcase

Release 13 didn’t have an equivalent CD (although it had many other things – most of them bugs), but with Release 14 in 1997 there was a concerted effort to add extra value. A program was put in place to produce a set of bonus stuff, partially developed by external parties. Unlike the Release 12 material, the Release 14 Bonus Tools were (kind of) incorporated into the main product, although they remained unsupported:

Although we put a great deal of effort into making sure the Bonus Tools are free of problems, they are not officially supported by Autodesk. We do not guarantee that the results are 100% error free.
 
To use the bonus tools, choose the Full installation option or select Bonus and Batch Plotting during a custom installation. The installation program places the bonus files in the BONUS\CADTOOLS directory and puts that directory in the Support File Search Path. The installation program also appends your ACADR14.LSP and ACAD.MNL files to ensure the proper loading of the bonus support file AC_BONUS.LSP and menu file AC_BONUS.MNU.

A lot of the things we now take for granted in AutoCAD were born as a result of this initiative. With AutoCAD 2000, Bonus Tools were renamed as Express Tools and some R14 Bonus Tools were removed while others were added to the core product. Several more features were added to an already handy collection, including TXT2MTXT:

autocad2000txt2mtxthelp

The history of Express Tools has been less illustrious since that high point. Autodesk made an ill-advised attempt to make money from them by removing them from AutoCAD 2000i and 2002 and first of all making them available only to VIP/Subscription (now called maintenance) customers as a carrot, then offering them for sale as AutoCAD Express Tools, Vol 1-9. That little business venture was always doomed to fail, and you can still find many sets of instructions allowing people with AutoCAD 2000 to carry across their Express Tools to 2000i and 2002.

Since then, other than some commands being absorbed into the core, it has been “maintenance mode” for Express Tools. This means the code just gets recompiled when necessary and very little actual maintenance goes on. As a result, some 20th Century bugs live on to this day.

Enough history! So what is this best thing? As a byproduct of improvements to PDFImport, the TXT2MTXT command was redone. Not much about this gets mentioned in the readme, but a whole bunch of very good things happened to this seemingly simple command (main source AutoCAD 2017.1 Preview Guide):

  • You can select Mtext objects in addition to Text objects.
  • A Settings option on the Command line displays the Text to MText Settings dialog. In the past you had to press Enter at the start of the command to see the dialog box.
  • Character codes translate correctly between Text and Mtext (e.g. text underlining appeared as %%U when converted to Mtext).
  • The “Select objects” prompt adheres to standard error checking and messaging. For example, objects on locked layers are filtered from the selection set.
  • Justification (Top left, Top center, Top right) is inferred for the Mtext object being created based on the positioning of the text objects in the drawing instead of always using Top left justification. When no justification can be logically inferred, it defaults to top-left.
  • Numbered and lettered list formatting is inferred when the word-wrap text box is checked. If a line starts with one or two characters followed by a period and up to 10 spaces, list formatting will be applied automatically.
  • The top-down sorting order is relative to the current UCS and sorting is left-to-right when text objects are collinear. When multiple text objects are collinear, they are treated as if on the same line with a space between them.
  • A new Settings option enables you to force uniform line spacing or maintain existing line spacing.
  • Various bugs are fixed that caused unexpected results when in a non-WCS UCS.
  • An option was added to the Settings dialog box to not combine selection into a single mtext objects (converts text object to mtext without combining).

That last item alone could be a huge time-saver. If you need to convert 100 text items to mtext (e.g. for background masking reasons), you can now use the command once rather than 100 times. Sure, there are LISP routines to do this (I’ve written some myself), but incorporating it into the core product makes things easier for large numbers of people.

It would not be a bad idea for Autodesk to go through all of the Express Tools looking for similar bug fixes and improvement opportunities. Instead of occasional ad-hoc drip-by-drip adoption of an Express Tool or two into the core, I propose that a special project be undertaken to go through the whole lot, fixing and improving them all. Once done, add them all to the supported functionality of the product, along with any related functionality that makes itself apparent during the overhaul.

Such a project strikes me as something relatively easy to do that would go down very well among customers. Or how about some totally new stuff? Express Tools 2018 – The Next Generation?

How to download Autodesk software without the Akamai download manager

Note: this post is now out of date. AVA no longer provides the facility mentioned here. Instead, it tries (and fails) to be clever.

For reasons beyond my understanding, Autodesk chooses to make life difficult for customers and prospective customers who want to download its products by imposing the use of a download manager (DLM) by Akamai. You really don’t want to let such a thing loose on your system even if it works, for reasons that have been explained in previous posts.

Until a couple of years ago, Autodesk allowed prospective customers to get at a direct download link after jumping through a few hoops and ignoring a bunch of bullshit warnings, but in recent times even that small measure of semi-decency has been removed. It became impossible for anyone who couldn’t or wouldn’t use the Akamai DLM to try out Autodesk’s products! Here’s what you get these days; there is no direct browser download option to be found, just a downloader stub you’re expected to install and give open slather on your system. Don’t.

autodeskdemodownload-2016

Yes, I know this is marketing lunacy, and several years ago I made Autodesk very aware of this via direct email contact. Still, Autodesk remains determined to hamper itself in this way and there seemed to be no prospect of a solution. The old loophole of using an unsupported browser (e.g. Opera) was closed off a while ago.

But wait! There’s an answer! While researching something unrelated, I came across a reference to the Autodesk Virtual Agent and had a look at it. Lo and behold, that contains a bunch of straightforward DLM-free links to the Autodesk product range!

autodeskvirtualagent

Click on Download Links, burrow down to find your product and direct links to the installers are right there! Use your plain browser, a DLM built into your browser, or a DLM of your choice. Easy! Straightforward! Amazing! Unfortunately, this facility only appears to be available in English.

To sum up, if you want to download an English-language Autodesk product in a straightforward manner:

Here’s the link! (link removed as it is now broken)

Draping images over surfaces in Civil 3D

Having recently overcome various difficulties to successfully drape an image over a surface in Civil 3D, it may be useful to pass on a few points I have learned. There are various posts and videos out there that helpfully go through this process, but some of them (including Autodesk sources) contain information that is irrelevant or just plain wrong, and none of them contained all  of the information I needed to complete the task.

I used Civil 3D 2015 for this, but the principles apply to all recent releases. Here is the basic sequence required:

  1. In the drawing containing the surface, attach the image to your drawing using your preferred method (ImageAttach, Xref, ClassicImage). I’ll assume you’re familiar with what you need to do to get the image correctly scaled and aligned with the surface.
  2. Invoke the DrapeImage command, which will show you this dialog:DrapeImage01
    Make sure this is set for the image you want to drape and the surface you want it draped over. You can change the Render Material Name to whatever you like, or leave it as the default. Pick OK.
  3. You no longer need the image attached to the drawing and it will probably only confuse matters, so you can use use the Xref or ClassicImage command to detach it.

If you’re really lucky, that’s it. You will have a lovely-looking surface with a draped image over it. However, at this stage that’s pretty unlikely. Don’t panic! You also need to ensure the following conditions are in place:

  1. The surface will need to use a surface style that includes triangulated surfaces so the image has something to drape over. In the Toolspace, under Surfaces, right-click on the surface and pick Surface Properties…, then change Surface Style to anything with triangles, triangulation or TIN in the name (this varies depending on the template used). If you don’t have such a style available, you’ll need to make your own or edit an existing one using the button with a pencil in it.DrapeImage02
  2. While you’re in the Surface Properties dialog, have a look at Render Material. That should be showing the Render Material Name you specified in step 2 above. If it isn’t, make sure it is. Pick OK.
    Bonus tip: if you later need to remove the draped image from the surface, you can do so by changing the Render Material to something else (e.g. ByLayer).
  3. Still seeing nothing useful? Make sure you are using the Realistic visual style. You can get at the Visual Styles Manager using the VisualStyles command, but in recent releases it has been made easier to switch visual styles using the in-canvas control:DrapeImage03
  4. Still nothing? Try turning off Hardware Acceleration. Right-click on that glowing blue blob thing in the lower right corner and pick Graphics Performance…DrapeImage04That will give you a dialog with a Hardware Acceleration switch. Turn it off, pick OK and (hopefully) voila!

Note that the above conditions need to be in place when plotting, too. You might not expect hardware acceleration to make a difference to plotting, but in this case, it does.

Restoring the Classic workspace in AutoCAD 2015, 2016 and 2017, etc.

One of the more common queries on my putting things back to “normal” posts is how to restore the AutoCAD Classic workspace in those releases where it is absent. Since Autodesk removed that workspace it has been too involved a process to fully describe how to do it in the context of my post. In the 2017 version of that post I’ve added a useful link, but as that’s a massive post and the link is buried near the end of it, this may have escaped your attention.

Here’s the link to Brazilian AutoCAD expert Luciana Klein’s step-by-step guide. It’s for AutoCAD 2016, but the principles apply to other releases and variants. Thanks to Luciana for going to the effort of putting this together.

AutoCAD 2017 – Putting things back to “normal”

The most frequently accessed posts on this blog are the AutoCAD 201x – Putting things back to “normal” series. They also attract a lot of comments:

Most Commented Posts

  1. AutoCAD 2013 – An Autodesk Help writer responds – 164 comments
  2. AutoCAD 2012 – Putting things back to “normal” – 158 comments
  3. AutoCAD 2011 – Putting things back to “normal” – 135 comments
  4. AutoCAD 2009 – Putting things back to “normal” – 121 comments
  5. AutoCAD 2010 – Putting things back to “normal” – 106 comments

The last one of these I did was for AutoCAD 2012, so I guess it’s well beyond time to bring things up to date for all those people who don’t like things being brought up to date. If there is something in particular I haven’t included in this post that you think people will find useful, please add a comment below and I’ll see what I can do.

I’m not suggesting it’s a good idea to turn all of these things off, it’s just a resource for people who want to know how to turn some of them off. These items are in alphabetic order. If you can’t find what you’re after, try your browser’s find/search option to look for a word on this page rather than this site’s search option which will search the whole site. If you still can’t find it, please comment and let me know what I’ve missed.

  • Aerial View. If you’re a relatively recent user of AutoCAD, you may have never seen the Aerial View window, but you might still find it useful. The DSVIEWER command (which turns this window on) has been undefined. You can use REDEFINE DSVIEWER to turn it back on, or just enter .DSVIEWER (with a leading period). It may not work perfectly on all systems under all circumstances, but give it a try and see what you think.
  • Array Dialog Box. The associative array features added by AutoCAD 2012 did not come with an Array dialog box. After protests from the crowd, AutoCAD 2012 SP1 reintroduced the old dialog box. This has been retained ever since and is accessed using the command ARRAYCLASSIC. Why isn’t it called CLASSICARRAY? Because by the time Autodesk wanted to restore this feature, I had already published ClassicArray™ and owned the trademark. Did ARRAYCLASSIC make ClassicArray defunct? Not entirely. The old Autodesk dialog interface is much less capable than ClassicArray and only allows the creation of simple non-associative arrays. If you want a dialog box interface and the modern array features (including Path arrays), you will still need my ClassicArray (which has the fortunate side-effect of acting as a workaround for several of the Array command’s various bugs, limitations and design issues). If you just want to control whether ARRAY creates associative or non-associative arrays, use the ARRAYASSOCIATIVITY system variable (1 for associative, 0 for non-associative).
  • Autocomplete. You may well find the automated filling in of your typed commands useful, but I find it’s too slow and gets confused, resulting in the wrong command being used. If it’s getting in your way, turning it off is as simple as AUTOCOMPLETE OFF. There are a variety of settings you can selectively turn off individually if you prefer, see Command Line below.
  • Blips. The BLIPMODE command has been undefined, but you can use REDEFINE BLIPMODE to turn it back on, or just enter .BLIPMODE (with a leading period).
  • Button Backgrounds. If you have your own or third-party Ribbon, toolbar or menu items, you may notice that AutoCAD 2017 messed up their transparent backgrounds. Believe it or not, this was a deliberate act by Autodesk. I intend to write a more detailed post on this in future, but the short version is that the BMP background of 192,192,192 is no longer supported so you need to use another format (e.g. PNG files) if you want your buttons to support transparency.
  • Classic Commands. If you prefer not to leave the various new palettes on screen all the time, old versions of various commands are still available: ClassicGroup, ClassicLayer, ClassicXref and ClassicImage. (Autodesk deprecated these commands in 2011, which I think is a really bad idea, but at least they’re still there in 2017). There is also a system variable LAYERDLGMODE, which when set to 0 will make the Layer command work in the old (and faster) modal way. If you use this setting, you can still access the new modeless layer palette with the LayerPalette command. Going back further, there are command-line methods of using these commands: -Layer, -Plot, -Xref, XAttach, -Image and ImageAttach.
  • Color Scheme (interface). Goth AutoCAD doesn’t appeal to you? If you don’t want to draw with a product that looks like a 10-year-old version of PaintShop Pro, you can lighten things up a bit using Options (right-click on the drawing area and pick Options… or just enter OP), then pick the Display tab, set Color Scheme to Light. See Graphic Background below for more options.
  • Coordinates. Bafflingly, Autodesk decided that most CAD users are uninterested in where things are placed in a drawing, so coordinate display is turned off by default. You’ll obviously need to turn them on to do any meaningful work (well, duh), so pick the 3-line Customization button at the lower right and turn on the Coordinates item at the top of that menu. Pick and choose among the various other options to get the buttons you want.
  • Command Line. There are many enhancements to the command line that theoretically make your keyboard-based interactions with AutoCAD more productive. I find that all of these features are great if I’m not in a hurry. If I just want to enter a short command and hit Enter, I find the command I get is wrong most of the time. To control which of these command line features you want on, use the INPUTSEARCHOPTIONS command.
  • Content Explorer. The Content Explorer was pretty horrible in many ways and Autodesk killed it. It’s gone and is unlikely to return, so you can stop looking for it. DesignCenter is still there and still does most of Content Explorer’s job, only better. Unfortunately, this means those people who did use Content Explorer’s unique functionality (e.g. searching for text among multiple drawings) are now out of luck until Autodesk does something about that.
  • Crosshairs. Want 100% crosshairs? Many people do. As before, use the Options command’s Display tab and look towards the bottom right, or set the CURSORSIZE system variable to 100.
  • Cursor Badges. About a dozen commands in AutoCAD now display a little glyph on the cursor to give you a visual clue about what you’re doing. If you find these pointless or annoying, turn them off by setting CURSORBADGE to 1. No, I have no idea why you use 1 to turn them off and 2 to turn them on, rather than 0 and 1 like pretty much everything else.
  • Customer Involvement Program. Those in the know always turn off whatever Autodesk phone-home activity they can find, not just because we’re a bunch of tin-hat-wearing paranoiacs, but because uses your resources and harms your performance. I’ve observed this happening, despite having been assured by Autodesk people that such a thing couldn’t possibly be occurring. The CUSTOMERINVOLVEMENTPROGRAM command has given access to one such setting for a few releases, but now there’s DESKTOPANALYTICS too. It’s not doing you any good, so kill it.
  • Dynamic Input. If Dynamic Input slows you down, you can turn it off with the status bar toggle or F12. If you like the general idea but don’t like some parts of it, there are lots of options available in the Dynamic Input tab of the DSettings command to enable you to control it to a fine degree. You can also get at this by right-clicking the Dynamic Input status bar button and picking Settings… As an example of the sort of thing you might do in there, the default of using relative coordinates is difficult for long-termers to get used to. To turn it off, pick the Settings… button in the Pointer Input panel, pick Absolute coordinates, then OK twice. There are a whole range of DYNxxx system variables for controlling this stuff.
  • File Tabs. Want vertical screen space more than you want to see what drawings you have open? Turn off File Tabs with the FILETABCLOSE command. You can still switch between drawings with Ctrl+Tab.
  • Graphic Background. After various experiments with black, white, black, cream, etc., for the last few releases Autodesk has stuck a nearly black background in model space only. Many of you will want a real black background to provide better contrast. To do this, invoke the Options command and pick the Display tab. Don’t be tempted to choose Color Scheme because that just changes the appearance of various user interface elements. Instead, pick the Colors… button. This will put you in the Drawing Window Colors dialog box. On the left, choose a context you want to change (e.g. 2D model space), choose the appropriate background element (e.g. Uniform background) and choose the particular shade that takes your fancy. There is a Restore Classic Colors button, but that only takes you back to AutoCAD 2008 with its black model and white paper space. If you want a black paper space background too, you’ll have to pick the Sheet / layout context and specify that individually. You may wish to put the Command line > Command line history background setting to white, too. When you’re done, pick Apply & Close, then OK.
  • Grid. If you use isometric snap and grid, you will be glad to find that AutoCAD 2017’s line-based isometric grid works properly, unlike some earlier releases. If you still prefer dots, right-click on the Grid status button and pick Grid Settings…, which will take you into the Drafting Settings dialog box, which you can also get at with the DSettings command, or DS for short. In the Snap and Grid tab, the grid is controlled by the options on the right. If you want your dots back, turn on the toggles in the Grid style section. This can also be done using the GRIDSTYLE system variable. This is now stored in the registry rather than on a drawing-by-drawing basis.
  • Hatch Dialog Box. If you want the Ribbon on but prefer the old Hatch dialog box, set HPDLGMODE to 1.
  • Hatch Double Click. If you’re not using the new Ribbon-based hatch editing feature, you will probably want to invoke the HatchEdit command when you double-click on a hatch object. Doing this involves braving the CUI interface, but I have gone into step-by-step detail of that process here. In short, you need to drag and drop the Hatch Edit command from the bottom left CUI panel onto the double-click action for Hatch in the top left panel, replacing the default action (Properties).
  • Help. If you want your Help to work with adequate speed and reliability, or to work at all in some proxy server environments, you will want to turn off AutoCAD’s online help. The installer for the AutoCAD 2017 English offline Help can be found here. For other languages, see here. However, downloading and installing it isn’t enough. Go into Options > System, then look in the bottom right pane to turn off the Use online help toggle. The Help structure remains destroyed and the interface is still a long way short of the excellent CHM-based Help we had prior to AutoCAD 2011, but at least it’s not as slow and externally dependant as the online Help system. Note that the search mechanism in the offline version is notably weaker than in the online version.
  • InfoCenter. This is the set of tools on the right top of the AutoCAD window. It takes up space, reduces AutoCAD reliability and performance and forces the use of Internet Explorer to support Autodesk LiveUpdate technology. You probably want it gone. Here’s how:
    (vl-registry-write
    (strcat "HKEY_CURRENT_USER\\" (vlax-user-product-key) "\\InfoCenter")
    "InfoCenterOn" 0)

    Paste the above lines into AutoCAD’s command line area and hit Enter. Close and start AutoCAD and InfoCenter will be gone. If you ever want it back, use the above code with a 1 in place of the 0, then close and restart AutoCAD.
  • Layout Tabs. You don’t get to choose where the layout tabs go, but you can turn them on and off using the LAYOUTTAB system variable.
  • Navigation Bar. If you like the NavBar feature as much as I do, you’ll want to turn it off. You can close it easily using the little X in its top left corner. Alternatively, control it with the NAVBARDISPLAY system variable (0 for off, 1 for on) or click the [-] button in the top left corner of the drawing area and turn off the Navigation Bar toggle there.
  • Pull-down Menus. Enter MENUBAR 1 to turn pull-down menus on. To turn them off again, enter MENUBAR 0.
  • Ribbon. You can close the Ribbon with the RibbonClose command. If you ever want to turn it back on, enter Ribbon.
  • Ribbon Galleries. AutoCAD 2015 introduced Ribbon Galleries: drop-down preview images of blocks, styles, etc. This cool-sounding feature might annoy you with its (lack of) performance, and as happens way too often, Autodesk forgot to include an off switch. AutoCAD 2016 introduced the GALLERYVIEW system variable; set this to 0 to get back up to speed. (Thanks, RK).
  • Screen menu. The SCREENMENU command has been undefined, but you can use REDEFINE SCREENMENU to turn it back on, or just enter .SCREENMENU (with a leading period). However, you can’t access the screen menu section in CUI any more, so if you want to maintain your screen menu you will need to do it in an ancient release or with a text editor operating on a .MNU file.
  • Security. There are various obstacles to productive use that can be placed in the way by the various security settings that have been progressively introduced since AutoCAD 2014. However, I’m not going to provide advice on removing those obstacles because of the risk such action can entail; I don’t want to be a party to making your system more vunerable. If you wish to look into this area, look up the SECURITYOPTIONS command and the SECURELOAD system variable. One security setting I’d suggest you definitely leave at the default value of 0 is LEGACYCODESEARCH, because that setting will protect you from the most common AutoCAD-specific malware without any practical downside. Feel free to look it up and take your own informed action, but you almost certainly don’t need to set this variable to 1.
  • Selecting Dashed Lines. AutoCAD now allows you to select objects with linetypes by picking the gaps. If you don’t want this, set LTGAPSELECTION to 0. Although 0 is supposed to be the default, I’ve seen AutoCAD working as if it were set to 1 even when it says it is 0. If so, set it to 1 and back to 0.
  • Selecting One Object at a Time. Does AutoCAD insist on only allowing you to select one object at a time? You probably have PICKADD set to 0. Set it back to the default of 2 or look for the Use Shift to add to selection toggle in the left pane of the Selection tab of OPTIONS. AutoCAD has been known to mangle this setting by itself. Yes, even when there is no possibility of a LISP routine messing with it.
  • Selection Cycling. Depending on your preference and/or system graphic performance, you may wish to turn off selection cycling (set SELECTIONCYCLING to 0), or at least the list that appears when selecting objects that lie on top of each other (set SELECTIONCYCLING to 1).
  • Selection Effect. If you want AutoCAD to show selected objects with old-style dashed lines rather than a glowing halo, set SELECTIONEFFECT to 0.
  • Selection Lasso. You can now select objects within irregular areas using the Lasso tool by clicking, holding and dragging. If this gets in your way, turn off the 4 bit of PICKAUTO (e.g. change PICKAUTO from 5 to 1). You may prefer to use the toggle for this in the left pane of the Selection tab of OPTIONS.
  • Selection Preview. This feature annoys some users, adding as it does an unfortunate degree of stickiness and working inaccurately when Snap is in use. This is controlled in the Selection tab of the Options command. Turn off the toggles in the Selection preview panel on the left (these control the SELECTIONPREVIEW system variable). If you dislike the coloured boxes you get while doing a Window or Crossing, pick the Visual Effect Settings… button and turn off the Indicate selection area toggle. This controls the SELECTIONAREA system variable.
  • Snap. By default, AutoCAD’s snap no longer works while there is no command active. Set SNAPGRIDLEGACY to 1 to turn this feature off.
  • Start Tab/New Tab/Welcome Screen. If you want AutoCAD to start in a blank drawing rather than using the Start Tab (New Tab or Welcome Screen in earlier releases), set the STARTUP system variable to 0. Note that if you turn off the Start Tab feature during installation or deployment creation, it’s not possible to later turn it back on using AutoCAD commands. If you’re unsure about whether or not you want to use the Start Tab, defer that decision until after installation.
  • Startup performance. You may have noticed that AutoCAD’s Ribbon switching performance is much faster than earlier releases. You may also have noticed that when you start AutoCAD, the cursor is sticky for a while after the Command prompt is available. These two items are not unrelated; AutoCAD is loading Ribbon components in the background. If you would prefer this not to happen, set the RIBBONBGLOAD system variable to 0.
  • Steering Wheel. Do you have a funny silver thing following your cursor around? Despise it? If it will stay still long enough you can hit the little X in the top right. Alternatively, use the NAVSWHEEL command to toggle it or click the [-] button in the top left corner of the drawing area and turn off the Steering Wheel toggle there.
  • Status Bar Text. You can’t have text-based status line toggles any more, so you can call off the search. Yes, I know. This is the poster child for Autodesk deliberately ignoring the clearly expressed wishes of its customers.
  • Toolbars. In AutoCAD 2009, you could turn individual toolbars on and off by accessing a menu obtained by right-clicking on the QAT. Autodesk somewhat vindictively removed that option in 2010, and it’s still gone in 2017, so I guess we can conclude that Autodesk really doesn’t want you using toolbars. A toolbar-toggling menu is still available if you right-click in an unused docked toolbar area, but if you have no toolbars visible there will be no such area available. What to do? Turn on one docked toolbar at the Command prompt, then you will be able to access the menu by right-clicking on the blank area to the right of it. The following command sequence will do it:
    _.-TOOLBAR ACAD.Standard _Top 0,0
    Paste this into AutoCAD’s command line area and the Standard toolbar will be turned on above your drawing area. This will leave a grey area to the right that you can right-click into. The other toolbars will be in sub-menus under that, with the main set of default ones in the AutoCAD section. Note that this will only work if you have the acad.cuix file loaded (or partially loaded). This is the case in vanilla AutoCAD and some verticals, but it may not be the case in other verticals.
  • Tooltips. Excessively intrusive and oversized tooltips were a “feature” of AutoCAD 2009’s revamped UI design, and we’ve been plagued with them ever since. I’m glad to see that many of them have had their verbosity somewhat curtailed (thanks to Dieter), but they still annoy the heck out of me, particularly by obscuring what I’m trying to see in dialog boxes. To kill them with fire, see Options > Display and start turning off toggles about half way down the left side.
  • Trace. The TRACE command has been undefined, but you can use REDEFINE TRACE to turn it back on, or just enter .TRACE (with a leading period).
  • UCS Icon. Don’t like the new simplified UCS icon? Sorry! While you can use the UCSIcon command’s Properties option to change the appearance of the icon in various ways, there’s nothing to restore the UCS Icon’s appearance from previous releases with its little arrows pointing the way.
  • ViewCube. I like the ViewCube concept, and I think it’s a great piece of interface design. But not everybody agrees. It has caused performance issues and it’s not very useful for 2D users. If you want it gone, that’s a surprisingly difficult thing to find out about. The simplest way to remove it is by clicking the [-] button in the top left corner of the drawing area and turning off the ViewCube toggle there. If you want more control, it’s handled using the Options command, in the 3D Modeling tab, in the bottom left corner. Turn off those toggles that don’t make sense for you. There is a related set of system variables called NAVVCUBExxx.
  • Workspace. The Workspace (gearwheel) control is now located near the bottom right corner. The item called AutoCAD Classic is long gone, unfortunately, so you’ll need to make your own classic workspace by manually setting up your interface the way you like it, then saving it as a Workspace using the Save Current As… option under the Workspace control. See this step-by-step description by Luciana Klein, (for AutoCAD 2016) along with clues from the various items above, for information on how to do this. Easier still, there is a script file to do this in this post by Edwin Prakaso. There’s a bug in the Workspace control that means it no longer reverts to a saved workspace directly. If you want to revert to the correct version of a workspace, you need to switch to a different workspace first and then back again.
  • Xref Fading. Don’t like your xrefs looking different? Use the Options command’s Display tab and look at the Xref display slider on the bottom right, or use the XDWGFADECTL system variable.
  • Zoom Animation. If you prefer your zooms to be instant rather than progressing from one view to another in an animated series of steps, you can turn off that feature using the VTOPTIONS command or the VTENABLE system variable.

If you have allowed AutoCAD to migrate your settings, some of the above will already be done for you, but by no means all of it. If past experience is anything to go by, the job done by Migration will be sub-optimal, but it received a major overhaul for 2017 so maybe it’s all good now. Call me paranoid/lazy/whatever, but I didn’t bother finding out. I’ve done without it for over a decade and will continue to do so; file under Problems left unfixed for so long that nobody cares when the fix finally comes.

Once you’re happy with your new environment, I suggest you save your workspace under a name of your choosing (Save Current As… under the Workspace gearwheel control), then export your profile in the Options command’s Profiles tab. Keep a safe copy of both your exported profile and your main CUIX file (acad.cuix by default), because that is where new workspaces are stored.

All of this advice is offered on an as-is, try-it-yourself-and see-what-happens basis. If in doubt, before you start messing make a safe profile, export it, then make an experimental profile and make it current. Back up any files you may have modified (e.g. acad.cuix).

I’ve probably missed a few things, so feel free to point them out or ask questions. I’ll edit this post to add relevant information.

AutoCAD’s ARRAYCLASSIC command is my fault

Ever wondered why most keep-the-old-version commands in AutoCAD are called CLASSICxxx but the old version of the ARRAY command is called ARRAYCLASSIC? Why can’t Autodesk be consistent for once? Sorry, that’s actually my fault. Here’s a little history.

  • AutoCAD Version 1.4 (1983) introduced the ARRAY command with Rectangular and Circular options.
  • AutoCAD Version 2.5 (1986) added the Polar option and hid the Circular option (but it’s still there).
  • AutoCAD 2005 introduced a dialog box version of the ARRAY command. The command-line version remained available via the -ARRAY command (with a leading hyphen).
  • AutoCAD 2012 introduced many new array features, including associative, path and 3D arrays. However, the dialog box interface was removed and the old command-line interface was back. There were also a bunch of bugs and limitations with the new regime.
  • I created and published the shareware utility ClassicArray™ to restore a familiar dialog box interface to AutoCAD’s array features. Rather than simply reproducing the old interface, I enhanced it to provide support for the new array features. I was also able to provide a workaround for some of AutoCAD’s array bugs and limitations.
  • By producing and selling a product called ClassicArray I established that as my trademark.
  • In AutoCAD 2012 SP1, Autodesk added the old dialog box interface back to AutoCAD and has left it in ever since. The restored interface did not support any of the new features. Calling the new/old command CLASSICARRAY would have infringed my trademark and I made sure Autodesk was aware of that fact in advance. That’s why ARRAYCLASSIC is called what it is.

Anyway, my ClassicArray exists and I still think it’s usefully better than what Autodesk provides. It has been updated to 1.1.0 to install and work smoothly with all AutoCAD releases from 2012 to 2017. Existing license holders can upgrade for free without my involvement and reuse their registration code with the new version. If you’re interested, hop over to classicarray.com.

Microsoft demonstrates why automatic updates are a terrible idea. Listening, Autodesk?

I like Windows 10. After some investigation and with some trepidation, I have upgraded two Windows 7 computers and one Windows 8 (ugh) computer to Windows 10. In use, I’m generally very happy with it. It boots fast, works well and most of the more ridiculous aspects of the Windows 8 “let’s assume your computer is a phone” interface are gone. The fact that I can scroll windows using my mouse wheel without first clicking on those windows to obtain focus is a real productivity plus. I would be happy to recommend Windows 10 to all Windows 8 users and most Windows 7 users, dependant on individual needs. I would, but I’m not. Microsoft is entirely responsible for that reluctance; read on.

The one thing I really, really dislike about Windows is the way it pushes updates. With Windows 7 I was always selective about what updates I allowed through and when they were applied. Windows 10 doesn’t give you that choice. It downloads and applies its updates as it sees fit, regardless of the importance of those updates, my bandwidth and the level of inconvenience applying those updates might cause. Windows 10 Professional only allows you to defer updates until the next restart, and will nag you to restart until you give in.

This is bad enough, but the Home version just takes over your computer and updates and restarts whenever it feels like it. Yes, even if you are in the middle of doing something and have unsaved work, and the update process leaves your computer unusable for two hours. I wouldn’t have believed it if it hadn’t happened to a very computer-smart member of my own family. Quite astonishing levels of malicious arrogance from the utter wankers at Microsoft.

I know there can be some very important reasons for keeping your OS up to date, particularly as far as urgent security patches are concerned. But really, given the choice between a tiny chance of some unknown malicious action by some unknown party (that hasn’t yet happened to any computer I’ve been running in over 30 years) and a 100% chance of known multiple malicious actions by Microsoft, which would you pick? Problem is, I made my choice on those three computers a few months ago and now I’m stuck with it.

Microsoft’s arrogance has triggered a minor in-house rebellion; two of my other former Windows computers are now happily running Linux. Five years ago, 100% of the computers in my household were running Windows. Now the figure is 43%, and I’m not even counting handheld devices (that would make it 20%). I haven’t bought a new version of Office in many years. Yes, I know, Microsoft isn’t exactly quaking in its boots, but it makes me feel better to raise the digit in this way.

Various other people are holding back on Windows 10 for this and other reasons, despite the insistent placement of update icons and nag notices. Some of those nag notices have made the news for all the wrong reasons. Last month, many people found themselves updated to Windows 10 without their explicit consent and against their will because Microsoft changed the status of the Windows 10 update for Windows 7/8 users and employed other sneaky tricks.

To Microsoft: that’s a really, really abhorrent low-life scumbag way to behave. These are our computers, not yours. We’re the customers (the ones providing the money) and you’re just vendors (the ones who want our money). Get back in your box and stop behaving like dickheads. Your assholery has been a significant factor in your decline. Give it up, it’s bad for you.

If you’re a Windows 7 or 8 user who wants to stay that way, please don’t disable updates altogether, because that could leave you vulnerable. Instead, I suggest you check out the free utility GWX Control Panel. If it’s too late and you’ve been updated, here’s what you can do. You have a limited amount of time to roll back.

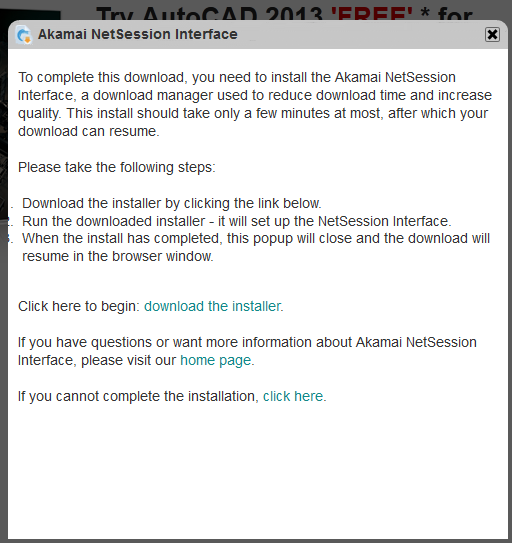
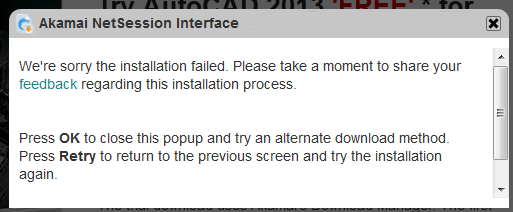
Autodesk wants your software to be updated like this, continually and automatically. This is a bad idea for a whole range of reasons that go beyond why it’s a bad idea for Microsoft to do it. I hope to expand on those reasons later, but this post is long enough already. Trust me, it’s a terrible idea.

Although right now Autodesk is doing a heart-warmingly poor job of implementing this concept, eventually it might get the technical details right and be in a position to force it on you. Fight it tooth and nail. Make your voice heard wherever you can, online and in person. Uninstall, disable or block any software that attempts to do this. Look for any utilities, tips, etc. that stand between your software and automatic updates, and spread that news far and wide. This is an important battle for control over our own property, so please don’t give up.

Navel gazing note: this is the 500th post published on this blog.

AutoCAD 2017 Feature – Share Design View

An interesting new feature of AutoCAD 2017 is Share Design View, which is invoked using the leftmost button on the A360 Ribbon tab or the ONLINEDESIGNSHARE command. The idea behind this command is to create a web-published snapshot of your drawing that can be accessed by anyone with a browser (they’ll need a fairly recent one).

This command works as advertised and provides another option to allow limited access to your design information without providing access to your DWG files. It creates a web page containing a view of your drawing and lets you have the URL (link) so you can access it. You can then share this URL with anyone you want to share the design with. They just follow the URL and can view the design using the Autodesk A360 Viewer (no download required).

Heidi Hewett wrote a fuller description of how it works on the AutoCAD blog that would be pointless to reproduce here.

One caveat: although Autodesk describes the design’s location as secure and anonymous, it’s important to understand that it’s an open location. Anybody with that URL has access to that page. Although the URL is long, complex and probably unguessable, if you email somebody that URL and they start an email forward/reply chain that ends up with other people, all of those people can also access that page and you might never know about it. Also, the index that Autodesk must maintain for all of these pages would be a prime target for hackers looking to steal design content, at which point “secure and anonymous” will be meaningless.

So maybe don’t use this method to share your nuclear plant designs. Also, rescind any sensitive designs as soon as access is no longer needed, in order to limit the exposure time (see About Conferring with Clients and Colleagues Online). The URL stays active for 30 days unless you rescind it earlier.

Autodesk is to be commended for providing this feature and documenting it well and honestly. There is little evidence of the misleading hype about security that tainted Autodesk’s DWF marketing back in the day. Here’s a Cloud-based feature that adds value to AutoCAD with little or no downside. Just be aware of its semi-open nature and use it appropriately.

Note: this feature requires A360 to be selected during installation or deployment creation (which it is by default). If A360 is not installed, the Share Design View button will be greyed out. The command will still exist and will attempt to connect to A360 but will then fail with a Service Unavailable message.

AutoCAD Help suckage to continue – confirmed

In a recent post on Between the Lines, Shaan passed on the following response from the AutoCAD Team:

There has been some recent discussions about the built-in help system in AutoCAD 2013, both positive and some criticism.  As our longtime users know, AutoCAD help has been through many evolutions.

We are particularly proud of the new AutoCAD 2013 online learning environment we recently released (AutoCAD Online Help Mid-Year Updates.) This update addressed several user requested fixes and changes, and we will continue to take our direction from our user’s feedback.

We do recognize that the online learning environment may not be the solution for every user, so while we are focused on creating a rich and personalized online experience, we will continue to maintain our current basic offline experience.

(The emphasis is mine). This statement, although couched in marketingspeak, confirms what I’ve had to say on the subject. Here’s my translation into plain English:

AutoCAD 2013 Help sucked, the customers said so, the recent update improved matters somewhat for online users, but the awful old system stays in place for offline users. The offline system is in maintenance mode, and the experience will continue to remain basic (i.e. it will suck long-term).

There’s no mention of correcting this situation; it’s clearly a matter of policy rather than some unfortunate accident.

Today, I was using Autodesk Navisworks Manage 2013. As you might expect from an Autodesk product, it’s powerful but unstable. In addition to the lockups and crashes, it has various bugs and annoyances. In looking for a way of working around one of the annoyances, I delved into the Help system. Strangely enough, this product (much younger than AutoCAD) uses something that looks remarkably like an old-fashioned CHM-based Help system. It worked offline. It was quick. It had contents, search and index tabs, and they worked on a Windows 7 64-bit system. It had a hierarchical structure and a breadcrumb bar that helped me understand the context of what I was reading. Using it was, in short, a breath of fresh air.

Memo to Autodesk: if you’re going to try to make online Help look good by mangling offline help, you’re going to have to do this to all your products at once to make it remotely convincing.

AutoCAD 2013 – Download from Subscription without Akamai

Edit (October 2016): see this post to download Autodesk software easily.

This year, Autodesk appears to have finally got its act together in terms of making software downloads and serial numbers available to Subscription customers quickly after the AutoCAD release. For me at least, the serial numbers and downloads were available as soon as I looked for them, so Autodesk deserves praise for improving matters considerably when compared with the last couple of years.

If you’re a Subscription customer about to download AutoCAD 2013, you may be wondering how you can avoid the awful Akamai Download Manager. If you go to the download page, scroll through the various languages and find the product you’re interested in, you will see a Download Now button. Do not click it, because that will trigger an Akamai infestation. Instead, click on the down arrow to the right of the button. That will give you the option of performing a Browser Download. Click that and away you go.

Subscription Download

The download sizes listed on the site are nearly double the real size of the downloaded files. The 32-bit version is actually 0.98 GB, not 1.89 GB. When you run the executable, it will unzip itself to expand to that size, but that’s not the size you need to know about when you’re downloading something.

In my case, the download happened at rather less than half the speed at which the trial came down (taking over 30 minutes for the 32-bit version rather than 13 minutes), but that’s not a valid comparison as I used a different Internet connection and a different browser. The file I downloaded from Subscription was byte-for-byte identical to the equivalent file downloaded as a trial.

AutoCAD 2013 – Download the trial without Akamai

Edit (October 2016): see this post to download Autodesk software easily.

It’s AutoCAD new release time again and many of you will want to get hold of the trial software, or download the production software from the trial site rather than the Subscription site for performance or other reasons (the resultant downloads are identical). As in previous years, Autodesk is heavily pushing the use of the Akamai Download Manager to download it, going to what I consider unethical lengths to do so. For a variety of reasons, some of which I’m not at liberty to discuss and others of which I have already discussed extensively, I strongly recommend not installing this software. In my view, it is a very bad idea to let anything by Akamai anywhere near your computer. If you’re in a secure corporate environment, it’s quite likely that you won’t be able to do so, or if you can, that it won’t work anyway.

Although the Autodesk download process gives every impression that you have no choice in the matter, this is not true. In the past I have had to install an unsupported browser (Opera) to get at a straightforward download link, but this time it is possible to get the software without having to resort to that. Here’s what to do. Go to http://usa.autodesk.com/autocad/trial/, fill in the form and click the Download Now button. You will be presented with this screen:

Avoiding Akamai

This is a pack of lies. Ignore everything except the line that says If you cannot complete the installation, click here. Click that and you will see this:

Avoiding Akamai

The feedback link takes you to Akamai’s site so it’s probably not useful as a mechanism to let Autodesk know what you think of its use of the Akamai Download Manager. I have used it in the past and it’s a black hole, so don’t waste your time there.

As you can see, there may not be an OK button visible, but if you scroll down you will see it. Click it.

Avoiding Akamai

That will get you to this screen:

Avoiding Akamai

More misleading stuff here, but the important thing is the text that says Click here to download using your browser. Click that and you can start actually downloading the installation executable.

The links I eventually got to using this process were:

http://trial.autodesk.com/SWDLDDLM/2013/ACD/ESD/AutoCAD_2013_English_Win_32bit.exe
http://trial.autodesk.com/SWDLDDLM/2013/ACD/ESD/AutoCAD_2013_English_Win_64bit.exe

At home, using Firefox 11.0, each download took just under a quarter of an hour without using any special download manager software. These links may not work for you and your experience may vary depending on your browser, location and language.

Oh, and Autodesk, the 2013 trial download page is still called AutoCAD 2012 – Free Trial – Download AutoCAD Trial – Autodesk and contains a link to the 2012 download FAQ. You might want to change that. You might also want to change the wording on the messages shown above to something less deceptive, especially if you’re interested in how much your customers trust you in future. Finally, I strongly suggest you give up on pushing this Akamai junk. Please.

Repost – how to get your picture next to your comment

This is a revisit of a post I made about three years ago, and repeated a year later. This has become more relevant recently because I changed the default avatars displayed next to comments to use random faces rather than random patterns. If you object to being portrayed as a grinning loon, read on.

You may have noticed that some people’s comments have an avatar picture next to them (no, not the film with the Roger Dean visuals), while others have a randomly assigned pattern. On this blog, the avatar picture is a gravatar (globally recognised avatar), and you can have one too. Once you set it up, you will find that it works in all sorts of places, not just this blog. Some other blogs may use other avatar standards, though.

Here’s how to do it:

  1. Visit gravatar.com and pick a sign up link.
  2. Provide a valid email address; the same one you provide when adding comments to blogs. I have not received any spam as a result of doing this, which is no surprise because Gravatar is owned by Automattic, Inc., the highly reputable WordPress people.
  3. You’ll be sent a confirmation email; click on the link in that and follow the prompts to set your password and so on.
  4. Choose your gravatar image from your hard drive, the internet, a webcam or a previously uploaded image. You can point to any size photo and will be prompted to select a cropped square area to display.

That’s it, although you can manage your account to provide multiple email addresses and images if you wish. Wait 5 or 10 minutes, then check out this or other blogs and web locations where you have made comments in the past. Those blogs with layouts that support gravatars should now display the picture that you associated with the email address you supplied when you made your comment. If the image doesn’t show up, do a reload/refresh and/or clear your browser’s cache and try again.

Taking control of your command line history

Thanks to Kean Walmsley’s post on his Through the Interface blog, I have learned something that would have been handy to know for the last decade or so, but which somehow escaped my knowledge. I learned how to increase the size of AutoCAD’s command line history cache. It defaults to 400 lines, which isn’t enough for me. I think this information deserves a wider audience than the ubergeek developers who frequent Kean’s blog, so here goes.

Although it’s not directly mentioned on Kean’s post, you can find the current command line history cache length setting like this:

(getenv "CmdHistLines")

This will return a value showing the number of command lines AutoCAD remembers, e.g. “400”. Although this is used as an integer value, it is passed to and from the Registry as a string. You can set a new value as shown below. Again, use a string, and note that values outside the range 25 to 2048 will be ignored:

(setenv "CmdHistLines" "2048")

Also, if you don’t like AutoCAD repeatedly stopping during a long listing (e.g. SETVAR ? *), you can turn off that feature by setting the QAFLAGS system variable to 2. Don’t set it to 8191 as suggested in Kean’s post, because that will change a lot of other settings, few of which are documented publicly.